
Thrift Store Christmas Decor Makeover
Share this post or pin it for later!
*This post may contain affiliate links. Thank you for supporting my small business…at no extra cost to yourself!
Want to save a little money this holiday season, but still want your home to look cozy and festive? Go to the thrift store! There are so many great pieces there, you just need to have a vision for them—that’s what I’m here for!

I was at Goodwill the other day killing a little time, as one does, and saw one of the employees with these woven rattan bells on his cart of items to put out. You’re not supposed to grab things from the cart, so I was trying to be patient in waiting for him to put them to put them on the shelf. There were other people hovering around and I was attempting to not be in the way or be rude, but I finally just had to shove my way to the front of the pack and ask him for them.
At $4.99, they were priced a little higher than I would have liked (that price for both would have been better), but they were by no means as expensive as buying them new. I wasn’t exactly sure where I would put them in the house, but I knew they had so much potential! Bonus…they were in great shape, so I didn’t really even have to do much to them if I didn’t want to.
Christmas is my favorite holiday to decorate our home for, especially getting to see all my vintage goodies again! You can see more of them in my Christmas Home tours!
How to Undecorate for Christmas
THE MAGIC OF RUB ‘N BUFF
If you’ve followed me for long, you know that one of the tools that is always in my arsenal for makeovers and DIY Projects is Rub ‘n Buff. If you’ve never used it, you need to get yourself a tube ASAP. It’s a metallic wax that comes in several different finishes (mostly gold, but there is also a silver and black), that you can paint or “rub” on to different items to transform them in a way that you just can’t do with paint. Whenever I’m asked why I prefer it over paint, the only explanation I can give is that it gives a more dimensional finish than paint does. To me, it looks like a more realistic gold than just using spray paint.


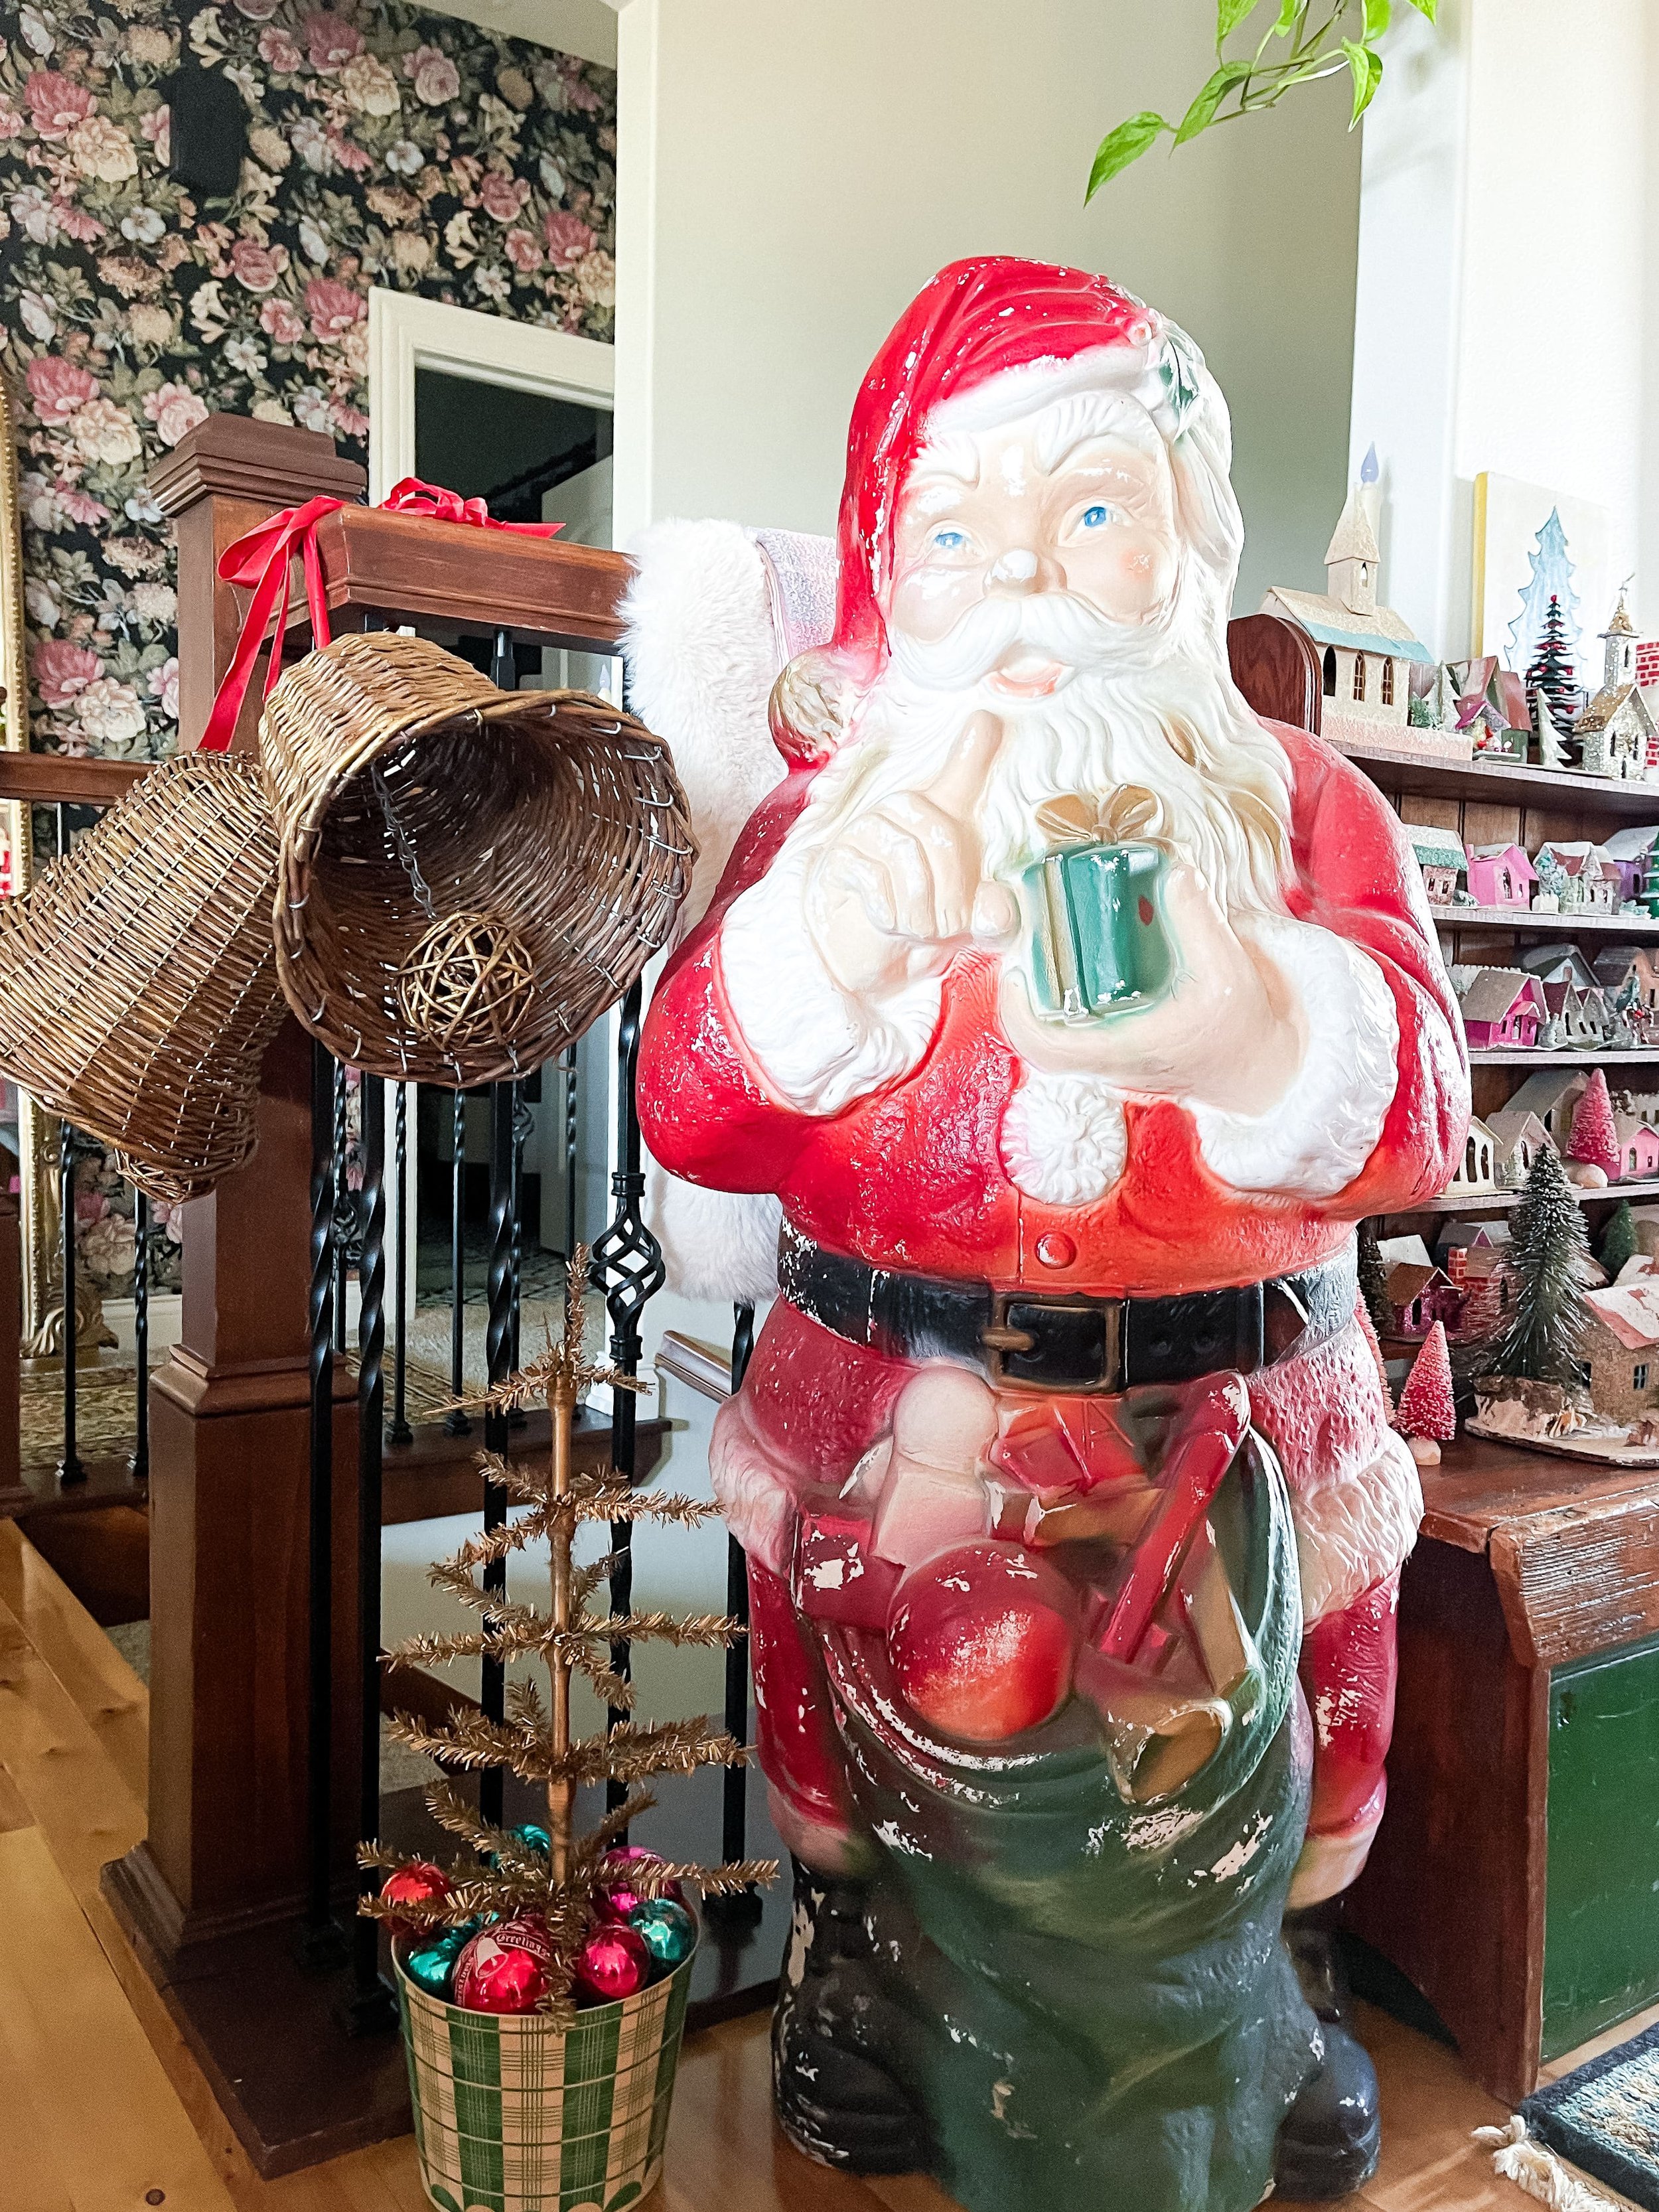
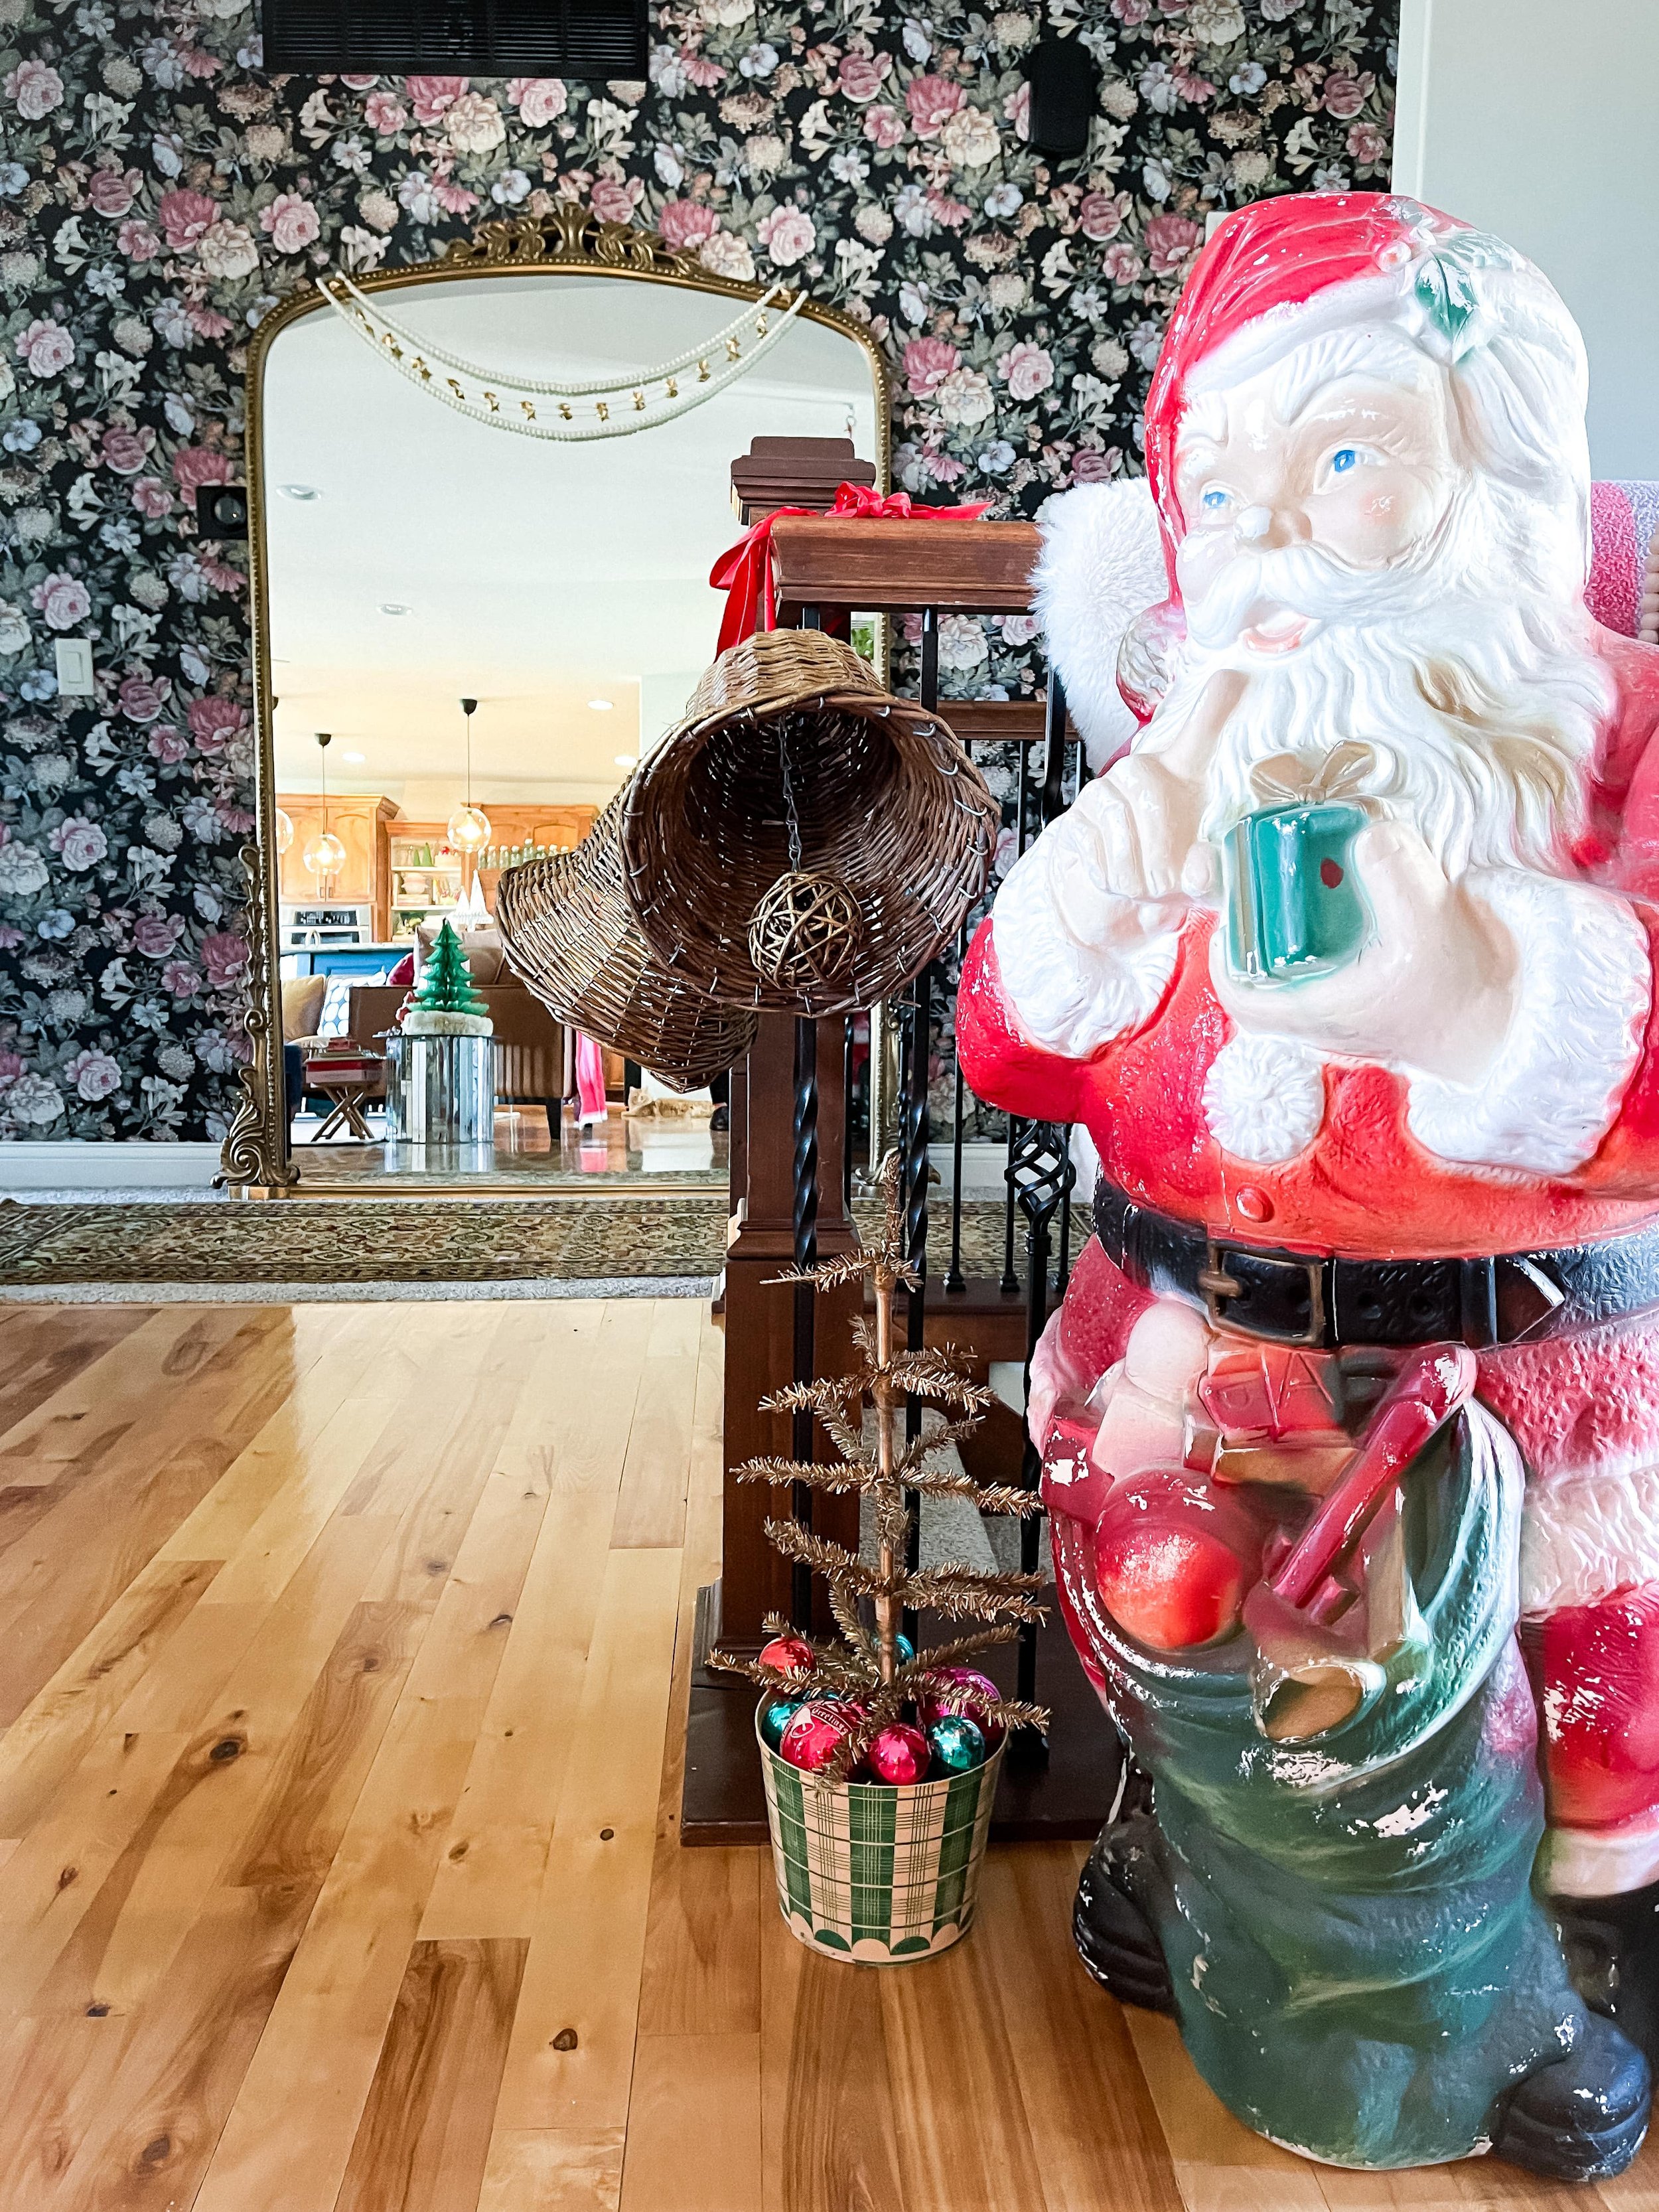
diy golden bells
There isn’t anything too complicated about this thrift store DIY. When I got the bells home, I carefully removed the ribbon from each. I had thought about changing it out to something else, but I didn’t have anything that would work the way I wanted an the red satin ribbon that came on the bells was in really nice shape and worked well in the space I wanted to display them.
Once the ribbon was off, I used a paint brush to apply the Rub ‘n Buff. A little goes a long way with this, so just use a bit at a time and add more if you need to. I worked in sections from top to bottom and side to side, since it’s kind of hard to see where you’re putting the Rub ‘n Buff on the rattan, until you’re able to step back and see it from farther away. The finished look isn’t full-coverage, but instead, just gives the bells a bit of a shimmer. I wanted them to work a little better with my other decor, which includes a lot of golden finishes, rather than the raw, natural wood. Both are beautiful, but the gold definitely fits I better with the rest of the Christmas decorations that I have. I also love the texture that the bells have. It looks so good with my vintage blow mold Santas and Santa mugs! They’re wonderful, of course, but it’s nice to have different textures in a display for more interest.


THRIFTED CHRISTMAS DECOR
To finish up the makeover, I laid both ribbons on top of each other and looped them through the tops of the bells together. When I tied them on to the banister, the bells naturally fell to hang at different lengths. I love the way they look and they’re the perfect addition to the Christmas moment I had already started in this spot. To create a bit of a design “triangle", much like you’d do when styling shelves, I added a gilded tree in an a vintage ice cream bucket, with Shiny Brite ornaments tucked in for more colorful fun! Of course, all of these items are thrifted, as is the majority of my Christmas decor. I love that I was able to reuse every bit of the Christmas bells that I thrifted…and that all they needed was a little love to fit into our home.
I have been shopping secondhand for about as long as I can remember and that goes for Christmas decor too. One of the easiest ways to stretch your budget, but still have an amazing and unique home (including at the holidays), is to thrift! I shop for Christmas decor year-round when I’m out at different thrift stores. Some do hold onto seasonal items to put out closer to the actual holiday, but most have at least one little section all the time. This is the best time to grab stuff, honestly, because then you have plenty of time to do any little DIY’s that you need to make it work with existing decor. Also, I have found that thrifting for Christmas decor is hottest November-January. This is the time when everyone is getting all their stuff out and deciding what they love and/or need to get rid of.


I hope that you are inspired by this little Christmas moment in our entryway. I know my style isn’t for everyone, but for me, it is pure vintage magic! I love to show you how you can create a home that you love, with plenty of coziness and style…almost completely from the thrift store! Maybe you already have some of these items in your basement or closets and were going to get rid of them or just don’t know how to use them. Sometimes all it takes is seeing how someone else styles an item to spark an idea in you. I hope that has happened for you today!

If you decide to do a thrift store Christmas makeover, I would love to see it! Share a picture of it to your Instagram stories and tag me when you do! You can find me on Instagram at @hilaryprall.


Want to set a pretty table for Thanksgiving, but don’t want to spend a lot of money? Shop your local thrift store! I always make it a fun challenge to myself to look for the perfect decor for holiday tables when I’m shopping secondhand. I thought I’d share mine with you this year, to help inspire you to do the same.